Zero to Hero: Building with Claude Code
1/16/2026
Share this post:
Export:
A Weekend Guide to AI-Augmented Development
Mission: Build a working dashboard mockup using Claude Code - no prior coding experience required
Time Investment: 2-4 hours to get comfortable, then iterate as much as you want
What You'll Learn:
- How to set up your development environment (Mac or Windows)
- Git fundamentals (your safety net - you can ALWAYS go back)
- AI-augmented product management (a new superpower)
- How to work with Claude Code to build real software
- How to create a React dashboard mockup
Table of Contents
- The Big Picture
- Setting Up Your Machine
- Creating a GitHub Account
- Installing the Tools
- Git Fundamentals - Your Safety Net
- Your First Project
- Working with Claude Code
- AI-Augmented Product Management
- Your Tech Stack
- Understanding package.json
- Building the Dashboard
- Running and Viewing Your App
- Debugging with Chrome DevTools
- When Things Go Wrong
- Bonus: Pushing to GitHub
- Quick Reference Card
The Big Picture
Here's what we're doing at a high level:
Your Computer
    |-- A folder called "my-dashboard" (this is your PROJECT)
        |-- Contains code files that make up your dashboard
        |-- Git tracks every change you make (like infinite undo)
        |-- Claude Code helps you write and modify the code

GitHub (optional but recommended)
    |-- A backup of your project in the cloud
    |-- You can share it, collaborate, or just have peace of mind
The most important thing to understand: Git is your safety net. Every time you "commit" your code, you're creating a save point. If you mess something up, you can ALWAYS go back. This is why professional developers are fearless - they know they can undo anything.
Setting Up Your Machine
What You Need
- A Mac or Windows computer
- An internet connection
- About 2GB of free disk space
- A sense of adventure
Open Your Terminal
The terminal (or command line) is where you'll interact with Claude Code. Don't be intimidated - it's just a text-based way to talk to your computer.
On Mac:
- Press
Cmd + Spaceto open Spotlight - Type "Terminal"
- Press Enter
You'll see a window with a blinking cursor. This is your command line.
On Windows:
- Press
Windows Key - Type "PowerShell"
- Click "Windows PowerShell" (not ISE, just the regular one)
You'll see a blue window with a blinking cursor. This is your command line.
Pro tip: You can also use VS Code's built-in terminal, or Windows Terminal for a nicer experience later.
Creating a GitHub Account
GitHub is where developers store and share code. Even if you only work locally, having an account lets you:
- Back up your code to the cloud
- Share projects with others
- Access millions of open-source projects
Steps to Create Your Account
- Go to github.com
- Click "Sign Up"
- Enter your email address
- Create a password (use a strong one, this account will be valuable)
- Choose a username
- Complete the verification puzzle
- Choose the FREE plan (it has everything you need)
- Skip the personalization questions or fill them out
You now have a GitHub account! Save your username and password somewhere secure.
Installing the Tools
We need to install a few things. Don't worry - this is a one-time setup.
1. Install Git
Git tracks your code changes and lets you undo mistakes.
On Mac (choose one method):
Option A - Xcode Command Line Tools (Recommended for beginners):
xcode-select --install
A popup will appear. Click "Install" and wait for it to complete.
Option B - Homebrew (if you have it installed):
brew install git
On Windows:
- Go to: git-scm.com/install/windows
- Download the 64-bit Git for Windows Setup (Git-2.52.0-64-bit.exe or newer)
- Run the installer
- Use all the default options - just keep clicking "Next"
- Click "Install"
- Click "Finish"
IMPORTANT: After installing, close your terminal and reopen it for the changes to take effect.
Verify Git is installed:
git --version
You should see something like git version 2.39.5 (Mac) or git version 2.52.0.windows.1 (Windows)
2. Install Node.js
Node.js lets you run JavaScript on your computer (React needs this).
On Mac and Windows:
- Go to: nodejs.org
- Download the LTS version (currently v24.x.x - the button on the left)
- Run the installer
- Use all the default options
- Restart your terminal after installation
Verify it worked:
node --version
You should see something like v24.13.0
Also check npm (Node's package manager):
npm --version
3. Install GitHub CLI
The GitHub CLI lets you interact with GitHub from your terminal.
On Mac:
brew install gh
If you don't have Homebrew, install it first:
/bin/bash -c "$(curl -fsSL https://raw.githubusercontent.com/Homebrew/install/HEAD/install.sh)"
On Windows:
Option A - WinGet (Recommended):
Important: You need to run PowerShell as Administrator for WinGet to work:
- Click the Start menu
- Type "PowerShell"
- Right-click "Windows PowerShell"
- Select "Run as administrator"
- Click "Yes" when prompted
Then run:
winget install --id GitHub.cli
Option B - Download installer:
- Go to: cli.github.com
- Click "Download for Windows"
- Run the installer
IMPORTANT: After installing, close your PowerShell window and open a new one for the changes to take effect.
Verify and authenticate:
gh --version
Now log in to GitHub:
gh auth login
Follow the prompts:
- Select "GitHub.com"
- Select "HTTPS"
- Select "Yes" to authenticate with your GitHub credentials
- Select "Login with a web browser"
- Copy the code shown, press Enter, and paste it in the browser
4. Install Claude Code
This is the star of the show!
Important: Claude Code requires a paid Claude subscription (Claude Pro, Team, or Enterprise). If you don't have one yet, sign up at claude.ai before proceeding.
On Mac/Linux:
curl -fsSL https://claude.ai/install.sh | bash
On Windows (PowerShell):
irm https://claude.ai/install.ps1 | iex
On Windows (CMD):
curl -fsSL https://claude.ai/install.cmd -o install.cmd && install.cmd && del install.cmd
Close and reopen your terminal, then verify it worked:
claude --version
Windows note: If you see a warning about the installation, follow the prompts - this is normal. The installer may ask you to confirm or adjust settings.
5. Authenticate Claude Code
claude
The first time you run Claude Code, it will ask you to authenticate. Follow the prompts to connect your Anthropic account.
Note: When Claude Code starts, it takes over your terminal window - this is normal! You're now in an interactive Claude Code session. To exit and return to your normal terminal, type /exit or press Ctrl+C.
Congratulations! Your development environment is ready.
Git Fundamentals - Your Safety Net
This is the most important section. Understanding Git means you'll never be afraid to experiment.
What is Git?
Git is a "version control system." Think of it like this:
- Without Git: You make changes to a file. If you mess up, you're stuck.
- With Git: Every time you "commit," you create a snapshot. You can go back to ANY snapshot, anytime.
It's like having infinite undo, but better - you can see exactly what changed between any two points in time.
Key Concepts
Repository (Repo)
A repository is a folder that Git is tracking. When you "initialize" a repo, you're telling Git: "Hey, watch this folder and track all changes."
Your folder before Git: Just files
Your folder after Git:   Files + hidden .git folder that tracks everything
Commit
A commit is a snapshot of your code at a specific moment. Each commit has:
- A unique ID (like
a1b2c3d) - A message describing what changed (like "Added navigation bar")
- A timestamp
- A record of exactly what changed
Think of commits like save points in a video game. You can always load an earlier save.
Branch
A branch is a parallel version of your code. The main branch is usually called main.
main:     A --- B --- C --- D  (your stable code)
                 \
feature:          E --- F      (experimental changes)
Branches let you experiment without affecting your main code. If the experiment works, you "merge" it back. If it doesn't, you just delete the branch.
For this weekend, you'll probably just use main. That's totally fine.
Staging Area
Before you commit, you "stage" your changes. This lets you choose exactly what goes into each commit.
Working Directory --> Staging Area --> Commit
(your files)         (ready to commit)  (saved snapshot)
The Commands (Don't Memorize - Claude Code Does This)
Here are the Git commands. You don't need to memorize these because Claude Code will run them for you. But it's good to understand what they do.
# Initialize a new repo (do this once per project)
git init

# See what's changed
git status

# Stage all changes
git add .

# Stage specific file
git add filename.js

# Commit with a message
git commit -m "Your message here"

# See commit history
git log --oneline

# Go back to a previous commit (SAFE - creates new commit)
git revert <commit-id>

# Go back to a previous commit (DESTRUCTIVE - erases history)
git reset --hard <commit-id>

# Create a new branch
git checkout -b branch-name

# Switch to existing branch
git checkout branch-name

# See all branches
git branch
The Safety Net in Practice
Here's the key insight: As long as you commit regularly, you can always go back.
Typical workflow:
- Make some changes
- Test them
- If they work --> commit
- If they break everything --> ask Claude Code to go back to the last commit
You can literally say to Claude Code:
"Something went wrong. Please reset to the last commit."
And Claude Code will do it for you. No memorization required.
Your First Project
Let's create a dashboard project!
Windows users: If you just finished authenticating Claude Code, your current PowerShell window is now running Claude Code. Open a new PowerShell window for the following steps. You'll come back to Claude Code later.
Step 1: Create the Project Folder
Open your terminal and run:
On Mac:
# Go to your Desktop
cd ~/Desktop

# Create the project folder
mkdir my-dashboard

# Go into the folder
cd my-dashboard
On Windows:
# Go to your Desktop
cd ~\Desktop

# Create the project folder
mkdir my-dashboard

# Go into the folder
cd my-dashboard
Step 2: Initialize Git
git init
You'll see: Initialized empty Git repository in .../my-dashboard/.git/
Your project is now a Git repository!
Step 3: Configure Git (One-Time Setup)
Tell Git who you are:
git config --global user.name "Your Name"
git config --global user.email "your-email@example.com"
Use the same email you used for GitHub.
Step 4: Create a README
Every project should have a README. Let's create one:
On Mac:
echo "# My Dashboard\n\nA dashboard project built with Claude Code." > README.md
On Windows:
"# My Dashboard`n`nA dashboard project built with Claude Code." | Out-File -FilePath README.md -Encoding utf8
Or you can just create the file manually in any text editor.
Step 5: Make Your First Commit
git add README.md
git commit -m "Initial commit - project setup"
Congratulations! You just made your first commit! You now have a save point.
Step 6: Start Claude Code
Now the fun begins:
claude
You're now in a Claude Code session. Claude can see your project and help you build.
Working with Claude Code
Starting a Session
From your project folder, just type:
claude
Claude Code will start and automatically understand the context of your project.
How to Talk to Claude Code
Claude Code is conversational. You don't need special syntax. Just describe what you want:
Good prompts:
- "Create a React app using Vite"
- "Add a sidebar navigation component"
- "The header is too big, make it smaller"
- "Add some mock data for revenue numbers"
- "Something broke, what happened?"
- "Go back to the last commit"
Even better prompts (more specific):
- "Create a React app using Vite with TypeScript and Tailwind CSS"
- "Add a sidebar with links to: Dashboard, Users, Settings, Reports"
- "Create a revenue card component showing $4.2M with a green up arrow and +12% label"
The Iteration Loop
Building software is iterative. Here's the typical flow:
1. Describe what you want
       |
       v
2. Claude Code creates/modifies code
       |
       v
3. You look at the result
       |
       v
4. You provide feedback or ask for changes
       |
       v
   (repeat until happy)
       |
       v
5. Commit your changes (save point!)
Useful Commands During a Session
Inside Claude Code, you can type:
/help- See available commands/clear- Clear the conversation (start fresh)/cost- See how much you've spent
When to Commit
Commit when you reach a "good state":
- A feature works
- Before trying something risky
- At the end of a work session
- Anytime you think "I don't want to lose this"
Just say: "Please commit these changes with message: Added navigation sidebar"
AI-Augmented Product Management
This is your new superpower. You're not just learning to code - you're learning a new way to turn ideas into clickable prototypes.
The Two Phases: Ideation vs Implementation
Phase 1: IDEATION (Think before you build)
- Focus on the WHAT, not the HOW
- Describe features in plain English
- Let Claude help expand and refine your ideas
- Create design documents
- Stay here until the vision is clear
Phase 2: IMPLEMENTATION (Build incrementally)
- Work in small steps
- Use mock data (not real backends)
- Test each piece before moving on
- Commit frequently
The biggest mistake: Jumping straight to implementation without ideating first.
The Ideation Process
Step 1: Describe What You Want (Not How)
Start with your vision. Don't worry about technical details.
"I want a dashboard that shows me the health of my business at a glance. I need to see revenue, user metrics, and any alerts. I want to feel like I'm in mission control."
Notice: No mention of React, components, or code. Just the vision.
Step 2: Ask Claude to Ask YOU Questions
This is the secret weapon. Say:
"Before we start building, please ask me clarifying questions about this dashboard. What else do you need to know to make this great?"
Claude might ask:
- "What time period should revenue show - monthly, quarterly, yearly?"
- "What metrics matter most to you?"
- "Who else will use this dashboard besides you?"
Your answers shape the product.
Step 3: Let Claude Expand the Ideas
"Based on what I've told you, what features would you suggest? What am I missing? Give me your recommendations and I'll tell you what resonates."
Claude might suggest:
- Alert banners for urgent issues
- Drill-down from summary to detail
- Comparison to previous periods
- Export capabilities
You respond: "Yes to alerts, skip the export for now, tell me more about drill-downs..."
Step 4: Create Design Documents
Before writing code, create markdown documents that capture your decisions:
"Please create a design document called DESIGN.md that captures:
- The purpose of this dashboard
- The main features we've discussed
- The data we'll display
- Questions we still need to answer"
This document becomes your north star.
The Mock Data Philosophy
Golden Rule: Always use mock data.
Why? Because:
- No backend complexity
- Instant results
- Easy to change
- Safe to experiment
- Shareable with anyone
Ask Claude to create mock data files:
"Create a mockData folder with JSON files for:
- users (name, role, activity)
- revenue (monthly numbers for the last 12 months) Make it realistic for a small SaaS company."
Your Tech Stack
Being opinionated about technology choices helps Claude Code give you consistent, high-quality results.
What We Use (and Why)
React - The most popular framework for building user interfaces. Huge community, tons of examples, Claude knows it extremely well.
TypeScript - JavaScript with type safety. Catches errors before they happen. Claude can help you even if you don't understand the types.
Joy UI (MUI) - A component library that gives you beautiful, professional-looking buttons, cards, tables, etc. out of the box.
Tailwind CSS - A utility-first CSS framework. Instead of writing custom CSS, you use predefined classes.
The Magic Phrase
When starting your project, always include:
"Use React with TypeScript, Joy UI for components, and Tailwind CSS for additional styling."
This sets Claude up for success.
Understanding package.json
Every JavaScript project has a package.json file. It's the project's manifest.
What's In There
{
  "name": "my-dashboard",
  "version": "1.0.0",
  "scripts": {
    "dev": "vite",
    "build": "vite build",
    "preview": "vite preview"
  },
  "dependencies": {
    "react": "^18.2.0",
    "@mui/joy": "^5.0.0"
  }
}
The Important Parts
scripts: Commands you can run:
npm run dev- Start the development servernpm run build- Create a production-ready version
dependencies: Other people's code your project uses.
You Don't Need to Edit This
Claude Code manages package.json for you. Just know it exists.
Building the Dashboard
Now let's build something real! Here's a suggested approach:
Phase 1: Project Setup
Say to Claude Code:
"Create a new React project using Vite with TypeScript, Joy UI, and Tailwind CSS. This will be a dashboard for tracking business metrics. Start by creating a DESIGN.md and asking me questions about what I want to see."
Phase 2: Layout Structure
"Create a dashboard layout with:
- A sidebar on the left (dark background, about 250px wide)
- A header at the top with the title 'Dashboard'
- A main content area Use Joy UI components. Make it look professional and modern."
Phase 3: Mock Data
"Create a mockData folder with realistic data for:
- Users (10 people with names, roles, activity scores)
- Revenue (monthly data for the last 12 months)
Also create 3 different scenarios:
- Dataset 1: Healthy business, all metrics good
- Dataset 2: Some users inactive, one metric underperforming
- Dataset 3: Revenue down 15%, multiple issues
Add a small toggle in the UI to switch between datasets."
Phase 4: Dashboard Cards
"On the main dashboard, create metric cards using Joy UI showing:
- Total Revenue: pulled from mock data
- Active Users: count from mock data
- Growth Rate: calculated percentage Show trend indicators (up/down arrows with percentages)."
Phase 5: Charts and Tables
"Add a revenue chart showing monthly revenue from the mock data. Below it, add a table showing the 'Needs Attention' items - any metrics that are off-target."
Phase 6: Navigation
"Make the sidebar navigation work:
- Dashboard (home view we just built)
- Users (list of all users)
- Revenue (detailed revenue view)
- Settings (placeholder page)
For now, each page can just show a simple list from mock data."
Remember to Commit!
After each phase works:
"Please commit these changes with message: Added [what you added]"
Running and Viewing Your App
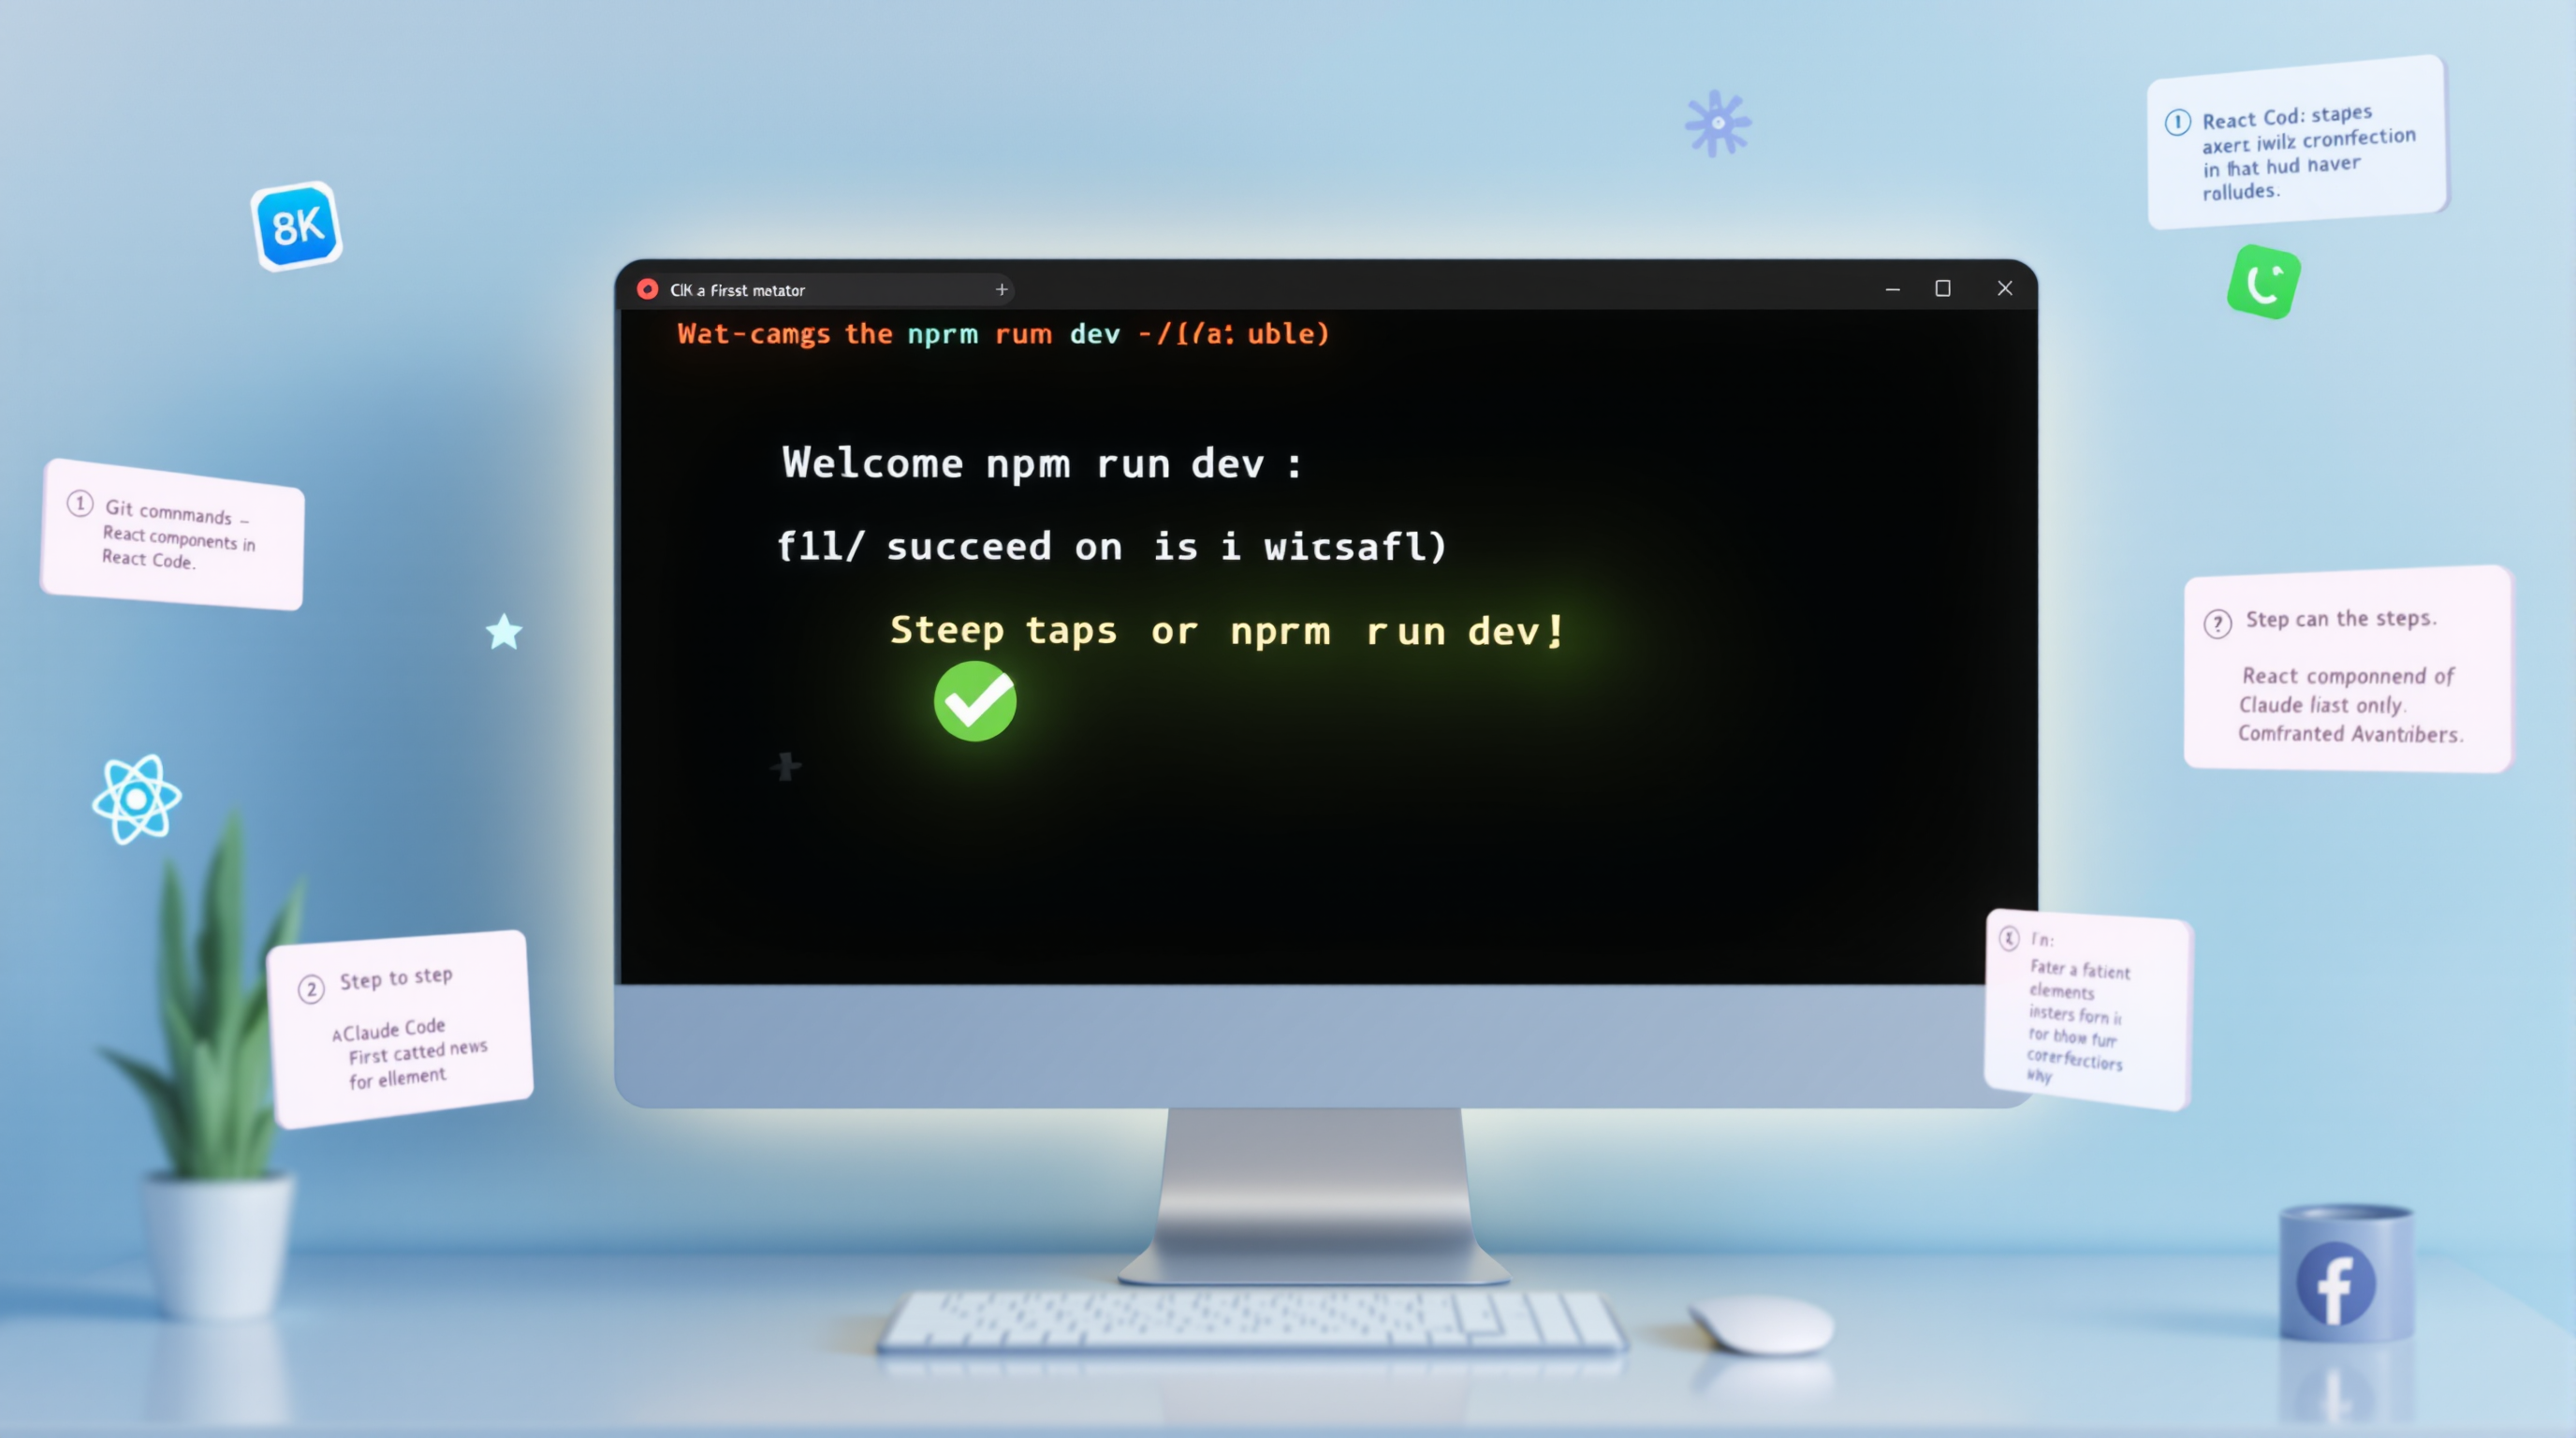
Starting the Development Server
After Claude sets up your project, you need to run it to see it in a browser.
Option 1: Ask Claude
"Start the development server"
Claude will run the command and tell you the URL.
Option 2: Run it yourself
npm run dev
What You'll See
The terminal will show something like:
  VITE v5.0.0  ready in 500 ms

  -->  Local:   http://localhost:5173/
  -->  Network: http://192.168.1.100:5173/
Opening in Your Browser
- Open Chrome (or any browser)
- Go to
http://localhost:5173(or whatever port is shown) - You should see your app!
Note: Vite typically uses port 5173. Some projects use 3000. Just use whatever the terminal shows.
What is localhost?
localhost means "this computer." When you go to localhost:5173, you're viewing a website that's running on your own machine - not on the internet. Only you can see it.
Hot Reloading
When Claude makes changes to your code, the browser automatically updates. No need to refresh. This is called "hot reloading."
Stopping the Server
To stop the development server:
- Press
Ctrl + Cin the terminal - Or just close the terminal window
Debugging with Chrome DevTools
When something goes wrong, Chrome's Developer Tools are your window into what's happening.
Opening DevTools
In Chrome, with your app open:
- Press
F12on your keyboard - Or right-click anywhere on the page and select "Inspect"
- Or press
Ctrl + Shift + I(Windows) /Cmd + Option + I(Mac)
The Console Tab
Click the "Console" tab. This is where errors and messages appear.
What you'll see:
- Red text = Errors (something broke)
- Yellow text = Warnings (something might be wrong)
- White/gray text = Info messages
When Something Breaks
If your app shows a white screen or something's not working:
- Open DevTools (F12)
- Click the Console tab
- Look for red error messages
- Copy the error message
Telling Claude About Errors
Just paste the error and describe what happened:
"I clicked the Users button and got this error:
TypeError: Cannot read properties of undefined (reading 'map') at UserList (UserList.tsx:23:15)
Can you fix it?"
Claude will understand the error and fix it.
Common Console Errors
| Error | What It Means |
|---|---|
Cannot read properties of undefined | Trying to use data that doesn't exist yet |
Module not found | A package isn't installed |
Unexpected token | Syntax error in the code |
Failed to fetch | Network request failed |
404 Not Found | A file or API endpoint doesn't exist |
When Things Go Wrong
Things WILL go wrong. This is normal. Here's how to handle it:
The App Won't Start
Say to Claude Code:
"The app won't start. Here's the error: [paste the error]"
White Screen of Death
This usually means a JavaScript error crashed the app.
- Open DevTools (F12)
- Check the Console for red errors
- Copy the error to Claude
- Say: "The app shows a white screen and I see this error in the console: [error]"
Something Looks Wrong
"The sidebar is overlapping the content. Can you fix it?"
Or better, be specific:
"The sidebar is 400px wide but I wanted 250px, and it's covering the main content instead of sitting next to it."
You Broke Everything
Don't panic! This is what Git is for.
Option 1 - Go back to last commit:
"Something is broken. Please reset to the last commit."
Option 2 - See what changed:
"Show me what changed since the last commit"
Option 3 - Selective undo:
"Undo the changes to the Header component but keep the sidebar changes"
You Want to Try Something Risky
Before experimenting:
"Please commit what we have now with message: Before experimental changes"
Now experiment freely. If it doesn't work out:
"That didn't work. Please go back to the commit before the experimental changes"
Common Issues and Solutions
| Problem | Solution |
|---|---|
| "Module not found" | Ask Claude to install the missing package |
| White screen | Check browser console (F12), copy error to Claude |
| Styling looks wrong | Describe what you expected vs what you see |
| Changes not showing | Try hard refresh (Ctrl/Cmd + Shift + R) |
| Git is confused | Ask Claude to show git status and help resolve |
| "Command not found" | Restart terminal - you may need the new PATH |
| Port already in use | Ask Claude to use a different port or kill the process |
Bonus: Pushing to GitHub
Once you have something working, you might want to back it up to GitHub.
Create a GitHub Repository
You can do this from Claude Code:
"Create a GitHub repository called 'my-dashboard' and push our code to it"
Or manually:
- Go to github.com
- Click the "+" in the top right
- Select "New repository"
- Name it "my-dashboard"
- Keep it Public or make it Private
- DON'T initialize with README (we already have one)
- Click "Create repository"
Push Your Code
If you created the repo manually, tell Claude Code:
"Push our code to GitHub. The repo URL is: https://github.com/YOUR-USERNAME/my-dashboard"
Why Push to GitHub?
- Backup: Your code is safe even if your computer dies
- Access Anywhere: Work from any computer
- Share: Show others what you built
- Portfolio: Proof of your work
Quick Reference Card
Terminal/Shell Basics
Mac:
cd folder-name    # Go into a folder
cd ..             # Go up one folder
cd ~              # Go to home directory
cd ~/Desktop      # Go to Desktop
ls                # List files in current folder
pwd               # Show current location
clear             # Clear the screen
Windows (PowerShell):
cd folder-name    # Go into a folder
cd ..             # Go up one folder
cd ~              # Go to home directory
cd ~\Desktop      # Go to Desktop
dir               # List files in current folder (or: ls)
pwd               # Show current location
cls               # Clear the screen (or: clear)
Starting Work
cd ~/Desktop/my-dashboard  # Go to your project (Mac)
cd ~\Desktop\my-dashboard  # Go to your project (Windows)
claude                      # Start Claude Code
Running Your App
npm run dev           # Start the development server
# Then open http://localhost:5173 in Chrome
Inside Claude Code
- Just type naturally - describe what you want
/help- See commands/clear- Fresh start- Ask Claude to commit when you reach a good state
- Ask Claude to go back if you mess up
Git Mental Model
Working --> Staging --> Committed --> (Optional) Pushed to GitHub
  ^                        ^
  |                        |
Your edits            Save points you can return to
Key Phrases for Claude Code
Ideation:
- "Before we build, ask me clarifying questions about..."
- "What am I missing? What would you suggest?"
- "Create a DESIGN.md capturing our decisions"
Implementation:
- "Create a [component/feature] using Joy UI..."
- "Add mock data for [feature]..."
- "Add a toggle to switch between mock datasets"
Maintenance:
- "Please commit with message: [your message]"
- "What's the git status?"
- "Go back to the last commit"
- "Start the development server"
Debugging:
- "I got this error in the console: [paste error]"
- "The app shows a white screen"
- "This doesn't look right, can you check [component]?"
Debugging Cheat Sheet
F12                   --> Open DevTools
Console tab           --> See errors (red text)
Ctrl/Cmd + C          --> Copy selected error text
Ctrl/Cmd + Shift + R  --> Hard refresh the page
Ctrl + C (terminal)   --> Stop the dev server
Platform-Specific Troubleshooting
Mac Issues
"xcode-select: error: tool 'xcodebuild' requires Xcode"
You only need the Command Line Tools, not full Xcode:
xcode-select --install
"permission denied" when installing globally
Never use sudo with npm. Fix permissions or use a version manager like nvm.
Windows Issues
"Claude Code requires git-bash"
If you see this error:
- Make sure Git for Windows is installed from git-scm.com
- Close and reopen PowerShell
- Try
claudeagain
"npm/node not recognized"
- Make sure Node.js is installed
- Close and reopen PowerShell
- Try again
PowerShell Execution Policy Error
If you get an error about execution policies:
Set-ExecutionPolicy -ExecutionPolicy RemoteSigned -Scope CurrentUser
Type Y to confirm.
Path Too Long Error
Windows sometimes has issues with long paths:
git config --global core.longpaths true
What You've Learned
By the end of this guide, you will have:
- Set up a professional development environment on Mac or Windows
- Created a GitHub account
- Understood Git fundamentals (repos, commits, branches)
- Learned AI-augmented product management (ideation --> implementation)
- Created a real React project with a professional tech stack
- Used Claude Code to build a dashboard with mock data
- Learned to run and view your app locally
- Learned to debug using Chrome DevTools
- Learned to commit changes (your safety net)
- Learned to recover when things go wrong
- (Bonus) Pushed code to GitHub
Most importantly: You've learned that building software is iterative, mistakes are recoverable, and AI assistants like Claude Code make the whole process accessible.
What's Next?
Once you're comfortable with the basics:
- Enhance the dashboard: Add more views, more mock scenarios
- Share it: Push to GitHub, share the URL with your team
- Get feedback: Have others click through and give input
- Iterate: Use their feedback to improve
- Build something else: Personal website, another tool, anything!
Claude Code Commands Reference
Claude Code has slash commands you can type during a session. Here's what you need to know, organized from essential to advanced.
Essential Commands (Start Here)
These five commands are all you need to be productive:
| Command | What It Does |
|---|---|
/help | Shows all available commands |
/clear | Wipes conversation history - fresh start |
/exit | Leave Claude Code (or just press Ctrl+C) |
/cost | See how much you've spent this session |
/compact | Compress conversation when context gets full (Claude will suggest this when needed) |
That's it. Five commands. You can build entire applications knowing only these.
Good to Know Commands
Once you're comfortable, these commands improve your workflow:
| Command | What It Does |
|---|---|
/model | Switch between Opus (smartest), Sonnet (balanced), Haiku (fastest/cheapest) |
/resume | Pick up where you left off in a previous session |
/doctor | Check if Claude Code is healthy, see available updates |
/config | Open settings menu |
/status | See current model, account, version info |
/init | Create a CLAUDE.md file for your project (instructions for Claude) |
/memory | Edit your CLAUDE.md files |
/login | Switch Anthropic accounts |
/context | Visual grid showing how full your context window is |
/todos | See Claude's current task list |
/rewind | Undo recent conversation turns |
Advanced Commands (Power Users)
These are for when you want to go deeper:
| Command | What It Does |
|---|---|
/plan | Enter planning mode (design before building) |
/review | Request a code review |
/security-review | Security audit of pending changes |
/pr-comments | See GitHub PR comments |
/export | Save conversation to a file |
/stats | Usage analytics, streaks, session history |
/mcp | Manage MCP (Model Context Protocol) server connections |
/plugin | Manage plugins |
/hooks | Set up automation triggers |
/agents | Custom AI subagents for specialized tasks |
/sandbox | Run commands in an isolated environment |
/vim | Vim-style editing mode |
/bashes | Manage background shell tasks |
/add-dir | Add more directories to context |
/permissions | View and update tool permissions |
Pro Tip: Custom Commands
You can create your own slash commands by adding markdown files to:
- Project commands:
.claude/commands/(shared with your team) - Personal commands:
~/.claude/commands/(available in all your projects)
For example, create .claude/commands/test.md and you can run /test in that project.
Postscript: Hard-Won Wisdom from the Trenches
Now that you have the basics, here are advanced tips that separate good Claude Code users from great ones. These come from building production software with AI assistance over the past year.
1. Git Is Your Superpower - Use It Aggressively
Commit on every forward progress "ratchet." Did something just work? Commit it. About to try something risky? Commit first. Finished a small piece of a larger feature? Commit.
Use branches liberally. Want to try a wild experiment? Create a branch:
git checkout -b experiment/crazy-idea
If it doesn't work out, throw the entire branch away:
git checkout main
git branch -D experiment/crazy-idea
No guilt. No sunk cost fallacy. The code is gone and you're back to a clean state.
Toss code without remorse. The biggest psychological shift: code is cheap, time is expensive. If you've been struggling for 20 minutes to get Claude Code to fix something, stop. Delete the changes. Think about what went wrong with your initial approach. Start fresh.
2. Context Is Everything - Protect It
Here's a crucial insight: once errors and bad design decisions enter the context window, they influence all subsequent outputs. Claude Code doesn't forget the mistakes you've been making together.
When to clear context and start fresh:
- You've been going in circles for more than 15-20 minutes
- Claude Code keeps making the same mistakes
- You realize your initial prompt was poorly formed
- The codebase has accumulated technical debt from trial-and-error
How to do it:
- Commit what you have (even if broken - you can revert)
- Type
/clearor exit and restart Claude Code - Write a better opening prompt based on what you learned
- Start fresh with clean context
3. Documentation Before Code (The 10-15 Markdown Strategy)
This is counterintuitive but powerful: sometimes I create 10-15 markdown documents before writing any code.
Why? Because:
- It forces you to think through the problem
- It gives Claude Code perfect context to work from
- If your session gets interrupted, you have your thinking preserved
- You can share the docs with others for feedback before building
The document hierarchy:
docs/
├── DESIGN.md         # What we're building and why
├── ARCHITECTURE.md   # Technical structure and patterns
├── DATA_MODEL.md     # What data exists and how it flows
├── USER_STORIES.md   # Who uses this and what they need
├── IMPLEMENTATION.md # Step-by-step build plan
└── QUEST_CHAIN.md    # Incremental milestones
The quest chain pattern is especially powerful. Break your project into small, independently testable milestones:
## Quest Chain: Dashboard MVP

### Quest 1: Basic Layout (20 min)
- [ ] Create shell with sidebar and header
- [ ] No real content yet, just structure
- [ ] TEST: Can see layout in browser

### Quest 2: Mock Data (15 min)
- [ ] Create mockData folder
- [ ] Add users.json with 10 users
- [ ] Add revenue.json with 12 months
- [ ] TEST: Can import and console.log data

### Quest 3: Dashboard Cards (25 min)
- [ ] Create MetricCard component
- [ ] Display Total Revenue card
- [ ] Display Active Users card
- [ ] TEST: Cards show mock data correctly

... and so on
Each quest is small enough that if it fails, you've lost very little. And each completed quest is a natural commit point.
4. Treat Claude Code as a Peer - The Hydration Pattern
Don't just give orders. Collaborate.
Before building, always ask:
"Before we implement this, what questions do you have? What am I missing? What could go wrong?"
Let Claude Code "hydrate" your specification. It often catches edge cases and asks questions that improve the final product.
Example dialogue:
- You: "I want to add user authentication"
- Claude Code: "A few questions: Should users be able to sign up themselves or only be invited? Do you need password reset? Should sessions expire? Do you want OAuth (Google/GitHub login)?"
- You: "Good questions. Invite-only, yes to password reset, sessions expire after 24 hours, no OAuth for now."
Now Claude Code builds exactly what you need.
5. Clear the Cognitive Market
This is a technique for getting truly novel ideas from Claude Code.
The pattern:
- Ask for 5-10 ideas
- Review them
- Ask for 5-10 MORE ideas that are NOT redundant with the first set
- Repeat until the new ideas start overlapping with old ones
Why this works: LLMs tend toward "mode collapse" - returning the most typical/expected answers. By explicitly asking for non-redundant ideas, you force the model to explore less obvious parts of the solution space.
The stopping criterion: When the new set significantly overlaps with previous sets, you've "cleared the market" - exhausted the useful idea space. Now you can stop exploring and start building.
Example:
"Give me 10 ideas for how users could filter the dashboard data"
[reviews list]
"Good. Now give me 10 MORE filtering ideas - but DO NOT repeat or be redundant with the previous ones. Focus on unconventional approaches."
[reviews second list - finds 3 novel ideas]
"Interesting. Give me 5 more, still non-redundant."
[reviews third list - all overlap with previous]
"Okay, we've cleared the market. Let's implement ideas #2, #7, and #14."
6. Use AI to Review AI
GitHub Copilot can review Claude Code's PRs. Set up Copilot code review on your repository, then:
- Claude Code creates a PR
- Copilot reviews it and leaves comments
- Have Claude Code respond to each Copilot comment in the PR
- Have Claude Code fix any legitimate issues Copilot found
This creates a paper trail of AI-assisted code review that catches real bugs.
7. Engineering Discipline Still Matters
AI assistance doesn't replace good engineering practices - it amplifies them.
Strong typing catches bugs early:
"Use TypeScript with strict mode. Define interfaces for all data structures."
Linters enforce consistency:
"Set up ESLint with the Airbnb style guide. Run lint on every save."
Tests verify behavior:
"Write unit tests for the calculateRevenue function. Use Jest."
Tell Claude Code to set these up on day one. Then you get the benefits automatically as you build.
8. Mock Everything for Rapid Prototyping
The biggest time sink for beginners: trying to set up real databases, authentication, and APIs before having a working UI.
The mock-first approach:
- Mock data files - JSON files with realistic fake data
- Mock API endpoints - Return mock data, no real backend
- Mock authentication - Hardcoded "logged in" state
- Mock everything else - Simulate any external dependency
Build the entire frontend with mocks first. Get it looking right. Get the interactions working. THEN replace mocks with real implementations one at a time.
Setup a data toggle:
"Add a developer panel that lets me switch between Mock Dataset 1 (happy path), Mock Dataset 2 (edge cases), and Mock Dataset 3 (error states). Hide it behind a keyboard shortcut."
Now you can demo your app in any state instantly.
9. The "Quest Chain" Implementation Pattern
When building anything non-trivial, break it into a quest chain:
## Implementation Quest Chain

### Phase 1: Foundation (no UI yet)
1. Set up project structure
2. Configure TypeScript, linting, testing
3. Create mock data files
4. Verify: `npm run dev` works, tests pass

### Phase 2: Layout Shell
5. Create basic layout (sidebar, header, main)
6. Add routing between pages
7. Verify: Can navigate between empty pages

### Phase 3: First Real Feature
8. Build first component with mock data
9. Add interactivity
10. Verify: Feature works end-to-end with mocks

### Phase 4: Second Feature
... and so on
Each phase is a commit point. If Phase 3 goes sideways, you can reset to the end of Phase 2 and try again with a different approach.
10. When Struggling, Reflect and Restart
The final tip: know when to cut your losses.
If you're 30 minutes into a session and things aren't working:
- Stop. Don't throw more time at it.
- Reflect. What did you assume that was wrong? What context did Claude Code lack? What was unclear in your prompts?
- Document. Write down what you learned in a markdown file.
- Clear context. Type
/clearor restart Claude Code. - Restart fresh. Use your new understanding to write a better opening prompt.
This feels like wasted effort, but it's not. The 30 minutes of struggling taught you something. The fresh start applies that learning. Progress often comes in these restart cycles, not in linear sessions.
Summary: The Advanced Workflow
1. DOCUMENT FIRST
   - Create design docs, architecture docs, quest chains
   - Build perfect context before writing any code

2. START SESSIONS WITH CLEAR CONTEXT
   - Reference your docs: "Read DESIGN.md and QUEST_CHAIN.md"
   - Be specific about what you're building in this session

3. BUILD INCREMENTALLY
   - One quest at a time
   - Commit after each quest
   - Test before moving on

4. USE GIT AGGRESSIVELY
   - Branches for experiments
   - Commits as save points
   - No sunk cost fallacy

5. CLEAR THE COGNITIVE MARKET
   - Ask for multiple ideas
   - Force non-redundancy
   - Stop when overlap increases

6. PROTECT YOUR CONTEXT
   - Fresh start when struggling
   - Better to restart than spiral
   - Errors in context stay in context

7. AI REVIEWS AI
   - Copilot reviews Claude Code PRs
   - Claude Code responds to comments
   - Paper trail of quality

8. MOCK EVERYTHING
   - Build UI with fake data first
   - Replace mocks with real implementations later
   - Multiple mock datasets for different scenarios
Master these patterns and you'll build software faster than most professional developers - while having AI do the heavy lifting.
Beyond Claude Code: Enterprise and Multi-Model Options
Claude Code is fantastic for individual developers and small teams. But what if you need:
- Multiple AI models - Not just Claude, but GPT-4, Gemini, Llama, and 90+ others?
- Team collaboration - Real-time collaboration with shared workspaces and permissions?
- Enterprise compliance - SOC 2, HIPAA, or FedRAMP requirements?
- Data sovereignty - All data stays in YOUR AWS account?
This is why my team built B4M CLI - a command-line interface that brings the power of Bike4Mind to your terminal.
What makes B4M CLI different:
- 90+ AI models in one CLI - switch between providers with a flag
- Mementos - automatic memory that persists across sessions
- Quest Master - autonomous task execution for complex multi-step workflows
- Team features - share sessions, collaborate on prompts, maintain audit trails
- Enterprise deployment - deploy the entire platform in your own AWS account
If you've mastered Claude Code and want to level up - especially for enterprise use cases - check out Bike4Mind and the B4M CLI documentation.
Final Thoughts
You're not learning to become a professional developer (unless you want to). You're learning to:
- Turn ideas into clickable prototypes
- Communicate better with technical teams
- Understand what's possible
- Build tools for yourself
- Practice AI-augmented product management
The best part? Claude Code handles the syntax and details. You provide the vision and direction.
This is the new product management. You can take what's in your head and make it real - not as a static mockup, but as a working, clickable prototype that you can share, test, and iterate on.
Welcome to building software. Have fun!
Guide created by Erik Bethke - January 2026 Built to be used with Claude Code Questions? Reach out: erik at bike4mind dot com
Verified URLs and Versions (as of January 2026):
- Git: v2.52.0 (Windows), v2.39.5+ (Mac via Xcode)
- Node.js LTS: v24.13.0
- GitHub CLI: v2.85.0
- Claude Code installation: code.claude.com/docs/en/setup
Related Posts
Claude Code Notifications on macOS: Sounds, Banners & Click-to-Focus in Any Terminal
Set up macOS notifications for Claude Code in ten minutes: distinct sounds for permission requests vs task completion, banners that name the project, ...
Claude Code as My GitHub Project Manager: 35 Issues Triaged in Minutes
How Claude Code helped me triage 35 GitHub issues, close 9 completed features, create app labels, and build a ghetto newsletter system - all while shi...
Two Claude Codes, Two Repos, One Solution: A Multi-Agent Workflow Story
How two Claude Code instances collaborated across different repositories to solve a 500 error by mining proven patterns from production code. A meta-n...
Subscribe to the Newsletter
Get notified when I publish new blog posts about game development, AI, entrepreneurship, and technology. No spam, unsubscribe anytime.
Comments
Loading comments...